안녕하세요! 오늘은 한국어 언어 모델 EEVE를 활용해서 로컬 RAG을 구현해 보겠습니다. RAG(Retrieval-Augmented Generation, 검색 강화 생성)는 외부 지식소스 검색을 통해 정보를 얻고, 이를 바탕으로 답변을 생성함으로써, 언어모델이 환각현상이나 부정확한 답변을 하지 않도록 보장하는 기술인데요, 이 블로그에서는 우수한 성능으로 올해의 한국어 언어 모델에 선정된 야놀자의 EEVE와 LLM 관리도구인 Ollama를 이용해서 영어 문서와 한국어로 대화하는 로컬 RAG를 구현하는 예제를 살펴보겠습니다.


"이 포스팅은 쿠팡 파트너스 활동의 일환으로, 이에 따른 일정액의 수수료를 제공받습니다."
프로그램 개요
오늘 알아볼 예제 코드는 대화상자를 통해 입력한 pdf 문서를 텍스트로 변환한 후, 질문에 관련된 문맥을 추출하고, Ollama에서 생성한 EEVE 모델을 통해 해당 문맥을 고려하여 사용자의 질문에 대한 응답을 생성하는 프로그램으로, 진행순서는 다음과 같습니다.
- 1. Ollama EEVE 모델 준비: 허깅페이스에서 GGUF 형식의 EEVE 모델을 다운로드하여 Ollama용 로컬 언어 모델을 생성합니다.
- 2. 깃 허브 레포지토리 복제: 예제 파이썬 코드를 로컬로 복사합니다.
- 3. 환경설정 및 의존성 설치: 가상환경을 생성하고 필요한 라이브러리를 설치합니다.
- 4. 참조문서 변환 및 저장: 질문하고자 하는 대상 문서(pdf, txt, JSON)를 텍스트 파일로 변환하여 저장합니다.
- 5. 예제코드 실행 및 결과확인: 저장된 텍스트를 참조하여 질문에 대한 답변을 출력합니다.
이 블로그에서 사용하는 예제 코드의 출처는 유튜브 "Easy 100% Local RAG Tutorial (Ollama) + Full Code"이며, 깃 허브 레포지토리 링크는 다음과 같습니다.
https://github.com/AllAboutAI-YT/easy-local-rag
GitHub - AllAboutAI-YT/easy-local-rag: SuperEasy 100% Local RAG with Ollama
SuperEasy 100% Local RAG with Ollama. Contribute to AllAboutAI-YT/easy-local-rag development by creating an account on GitHub.
github.com
예제코드의 실행환경은 Windows 11 Pro(23H2), 파이썬 버전 3.11, 코드 에디터는 비주얼 스튜디오 코드(이하 VSC)이며, VSC를 실행하여 "WSL 연결"을 통해 Windows Subsystem for Linux(WSL) Linux 환경에 액세스 하도록 구성합니다.
EEVE 준비 및 환경설정
먼저, 언어 모델 관리도구인 Ollama가 설치되어 있지 않은 경우, Ollama 다운로드 페이지에 접속하여 WSL에서 리눅스 버전을 설치한 다음, "ollama serve" 명령으로 서버를 시작하면 언어 모델이 "localhost:11434" 주소에서 서비스됩니다.
EEVE 언어 모델 다운로드 및 Ollama 모델 생성은 허깅페이스에서 GGUF 파일을 다운로드하고 Ollama에서 Modelfile을 통해 로컬 언어 모델을 생성하는 과정으로, 아래 링크를 통해 이전 포스트를 참고하시면 될 것 같습니다.
2024.04.13 - [대규모 언어모델] - [AI 논문] 올해의 한국어 LLM에 선정된 야놀자 언어 모델, EEVE
[AI 논문] 올해의 한국어 LLM에 선정된 야놀자 언어 모델, EEVE
안녕하세요! 오늘은 최근 "올해의 한국어 LLM"으로 선정된 야놀자의 대형 언어 모델, EEVE에 대해 살펴보겠습니다. EEVE모델은 Efficient and Effective Vocabulary Expansion의 약자로, 효율적이고 효과적인 어
fornewchallenge.tistory.com
다음은 아래 명령어를 복사하여 깃 허브 레포지토리를 로컬로 복제 후, "eay-local-rag" 디렉토리로 이동해서, "python3.11 -m venv myenv" 명령으로 가상환경을 생성하고, "source myenv/bin/activate" 명령어로 활성화합니다.
git clone https://github.com/AllAboutAI-YT/easy-local-rag
그리고, 참조파일 업로드 대화상자를 만들기위해 필요한 GUI 표준 모듈의 설치를 위해 "sudo apt-get install python3-tk" 명령어를 실행하여 tkinter 패키지를 설치합니다. 저는 로컬설치(pip install tk)가 아닌 전역설치로 진행하였습니다.
sudo apt-get install python3-tk
tkinter 패키지를 사용하면 다음과 같은 기능을 구현할 수 있습니다:
- 윈도우 및 위젯 생성: 윈도우 및 다양한 종류의 위젯(버튼, 레이블, 텍스트 상자 등)을 생성할 수 있습니다.
- 이벤트 처리: 사용자 입력 및 시스템 이벤트(마우스 클릭, 키보드 입력 등)를 처리할 수 있습니다.
- 레이아웃 관리: 위젯의 배치 및 크기 조절을 관리하여 GUI의 레이아웃을 설계할 수 있습니다.
- 그래픽 요소 추가: 그래픽 요소(선, 원, 사각형 등)를 그리고 편집할 수 있습니다. 다양한 스타일 및 구성 옵션: 위젯의 스타일 및 구성 옵션을 조정하여 사용자 정의 GUI를 생성할 수 있습니다.
- 대화 상자 생성: 다양한 대화 상자(메시지 상자, 파일 대화 상자 등)를 생성하여 사용자와 상호작용할 수 있습니다.
다음은 아래 텍스트 내용을 복사해서 requirements.txt라는 이름으로 파일을 만든 다음, 가상환경이 활성화된 WSL 프롬프트에서 "pip install -r requirements.txt" 명령어로 의존성을 설치해 줍니다.
sentence-transformers
openai
torch
PyPDF2
위 requirements.txt를 통해서 설치되는 각 라이브러리의 기능은 다음과 같습니다.
- sentence-transformers: 문장 임베딩을 생성하는 데 사용되는 라이브러리입니다. 이 라이브러리는 다양한 사전 학습된 문장 임베딩 모델을 제공하며, 특정 문장 또는 문서를 벡터로 변환하여 문장 간 유사성을 측정하거나 자연어 처리 작업에 활용할 수 있습니다.
- openai: 자연어 처리, 텍스트 생성, 기계번역, 감성 분석, 이미지 분류 및 생성, 객체 탐지와 같은 작업을 처리할 수 있으며 OpenAI에서 개발한 GPT 대형 언어 모델과 다양한 API를 지원합니다.
- torch: PyTorch는 파이썬 기반의 오픈소스 머신러닝 라이브러리로, 딥러닝 모델을 구축하고 학습시키는 데 사용됩니다. PyTorch는 유연하고 직관적인 API를 제공하여 모델의 구성, 학습 및 추론을 간편하게 할 수 있습니다. 또한 PyTorch는 GPU 가속을 지원하여 대규모의 데이터와 복잡한 모델을 효과적으로 처리할 수 있습니다. 이를 통해 딥러닝 모델의 학습과 추론 속도를 향상시킬 수 있습니다.
- PyPDF2: 파이썬에서 PDF 파일을 처리하기 위한 라이브러리입니다. 이 라이브러리를 사용하면 Python 코드에서 PDF 파일을 열고 읽을 수 있으며, 텍스트 추출, 페이지 추출, 페이지 회전 등과 같은 작업을 수행할 수 있습니다. PyPDF2는 간단한 PDF 작업을 수행하기 위한 유용한 도구입니다.
참조문서 텍스트 변환
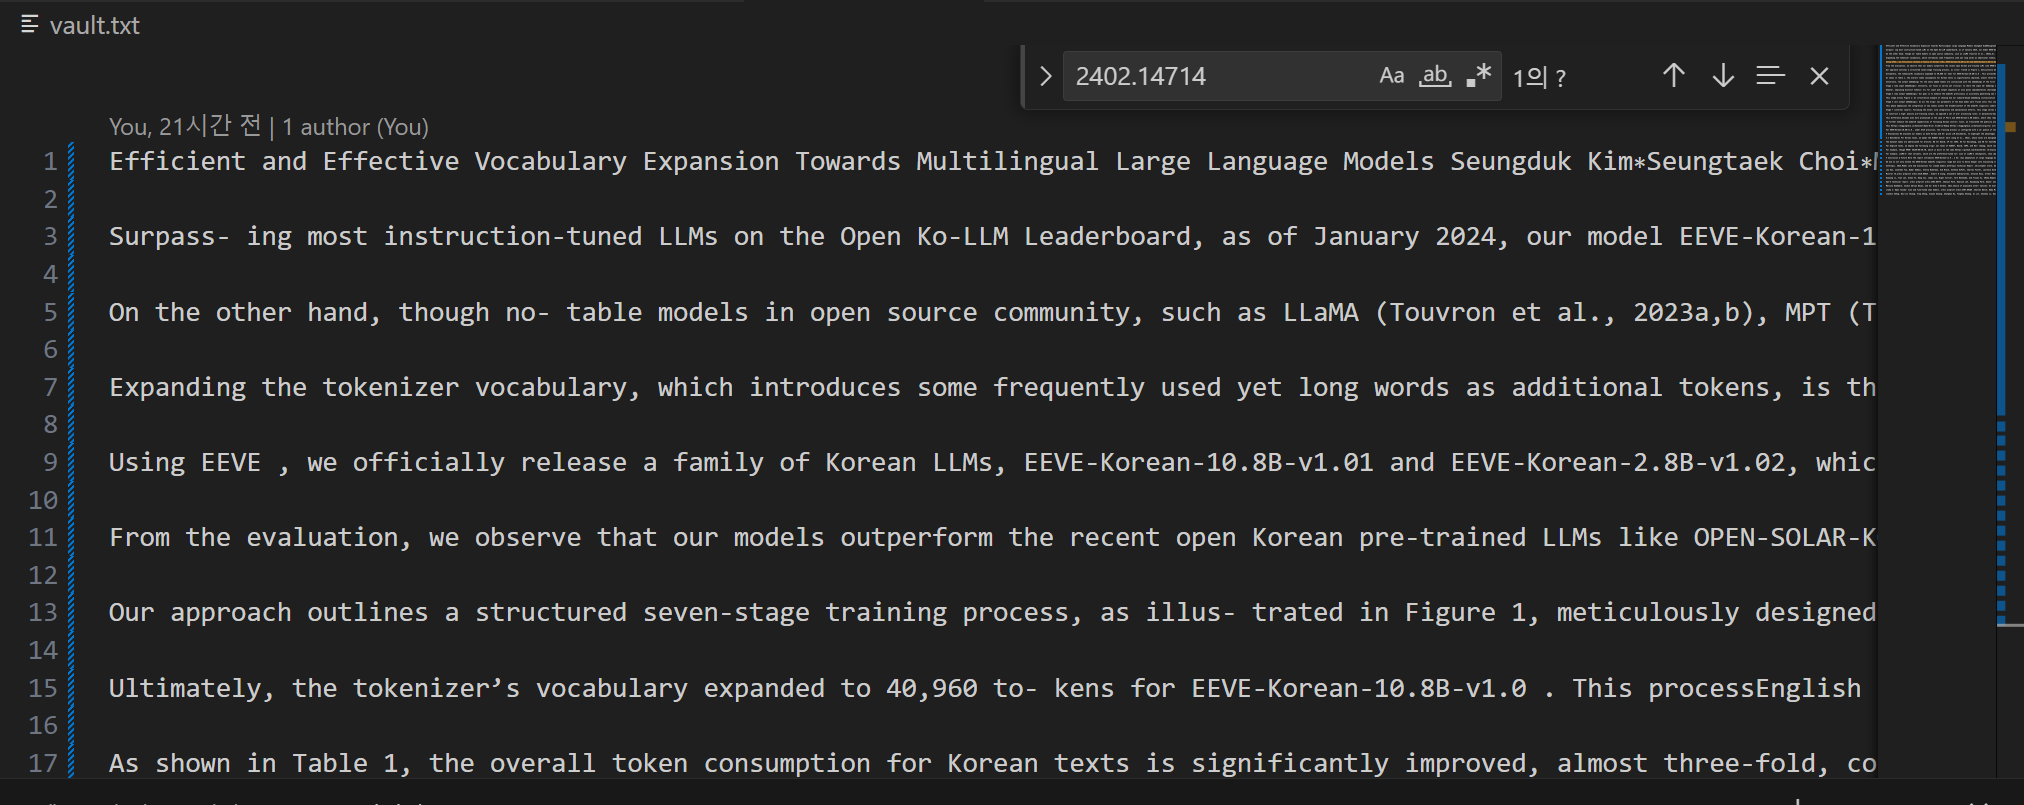
다음은 깃 허브 레포지토리에서 복제한 파일 중 "upload.py"를 실행하여 사용자 질문의 답변을 검색할 참조문서를 텍스트로 변환하는 과정입니다. 여기서 지원하는 참조문서의 형식은 pdf, txt, json이 가능하며, 아래 코드를 복사하여 실행하면 pdf 파일을 선택할 수 있는 대화상자가 열리며, 파일의 내용이 텍스트로 추출되어 vault.txt 파일에 저장됩니다.
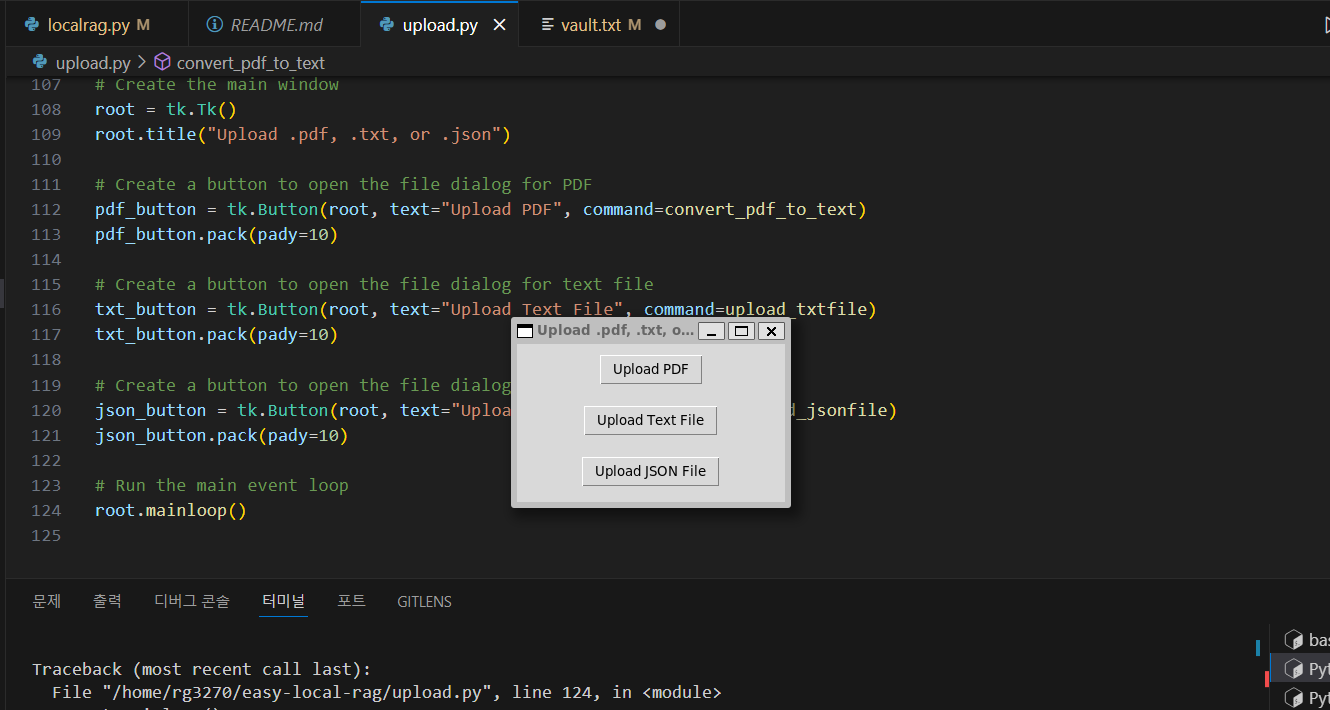
이 코드는 tkinter를 사용하여 GUI를 생성하고, 사용자가 PDF 파일, 텍스트 파일 또는 JSON 파일을 불러올 수 있는 기능을 제공합니다. 각 파일 형식에 대한 업로드(선택) 버튼을 제공하고, 사용자가 해당 버튼을 클릭하면 파일 대화 상자가 열리고 파일을 선택할 수 있으며, 선택한 파일의 텍스트는 PyPDF2를 통해 텍스트로 변환됩니다.
- PDF 파일 업로드 기능: 사용자가 "Upload PDF" 버튼을 클릭하면 PDF 파일 대화 상자가 열리고, 사용자가 PDF 파일을 선택할 수 있습니다. 선택한 PDF 파일은 PyPDF2를 사용하여 텍스트로 변환되고, 각 페이지의 텍스트가 최대 길이가 1000자인 여러 개의 문장으로 나누어져서 텍스트 파일인 "vault.txt"에 추가됩니다.
- 텍스트 파일 업로드 기능: 사용자가 "Upload Text File" 버튼을 클릭하면 텍스트 파일 대화 상자가 열리고, 사용자가 텍스트 파일을 선택할 수 있습니다. 선택한 텍스트 파일의 내용은 최대 길이가 1000자인 여러 개의 문장으로 나누어져서 "vault.txt"에 추가됩니다.
- JSON 파일 업로드 기능: 사용자가 "Upload JSON File" 버튼을 클릭하면 JSON 파일 대화 상자가 열리고, 사용자가 JSON 파일을 선택할 수 있습니다. 선택한 JSON 파일의 내용은 문자열로 변환되고, 이 문자열은 최대 길이가 1000자인 여러 개의 문장으로 나누어져서 "vault.txt"에 추가됩니다.
import os
import tkinter as tk
from tkinter import filedialog
import PyPDF2
import re
import json

# Function to convert PDF to text and append to vault.txt
def convert_pdf_to_text():
    file_path = filedialog.askopenfilename(filetypes=[("PDF Files", "*.pdf")])
    if file_path:
        with open(file_path, 'rb') as pdf_file:
            pdf_reader = PyPDF2.PdfReader(pdf_file)
            num_pages = len(pdf_reader.pages)
            text = ''
            for page_num in range(num_pages):
                page = pdf_reader.pages[page_num]
                if page.extract_text():
                    text += page.extract_text() + " "

            # Normalize whitespace and clean up text
            text = re.sub(r'\s+', ' ', text).strip()

            # Split text into chunks by sentences, respecting a maximum chunk size
            sentences = re.split(r'(?<=[.!?]) +', text)  # split on spaces following sentence-ending punctuation
            chunks = []
            current_chunk = ""
            for sentence in sentences:
                # Check if the current sentence plus the current chunk exceeds the limit
                if len(current_chunk) + len(sentence) + 1 < 1000:  # +1 for the space
                    current_chunk += (sentence + " ").strip()
                else:
                    # When the chunk exceeds 1000 characters, store it and start a new one
                    chunks.append(current_chunk)
                    current_chunk = sentence + " "
            if current_chunk:  # Don't forget the last chunk!
                chunks.append(current_chunk)
            with open("vault.txt", "a", encoding="utf-8") as vault_file:
                for chunk in chunks:
                    # Write each chunk to its own line
                    vault_file.write(chunk.strip() + "\n\n")  # Two newlines to separate chunks
            print(f"PDF content appended to vault.txt with each chunk on a separate line.")

# Function to upload a text file and append to vault.txt
def upload_txtfile():
    file_path = filedialog.askopenfilename(filetypes=[("Text Files", "*.txt")])
    if file_path:
        with open(file_path, 'r', encoding="utf-8") as txt_file:
            text = txt_file.read()

            # Normalize whitespace and clean up text
            text = re.sub(r'\s+', ' ', text).strip()

            # Split text into chunks by sentences, respecting a maximum chunk size
            sentences = re.split(r'(?<=[.!?]) +', text)  # split on spaces following sentence-ending punctuation
            chunks = []
            current_chunk = ""
            for sentence in sentences:
                # Check if the current sentence plus the current chunk exceeds the limit
                if len(current_chunk) + len(sentence) + 1 < 1000:  # +1 for the space
                    current_chunk += (sentence + " ").strip()
                else:
                    # When the chunk exceeds 1000 characters, store it and start a new one
                    chunks.append(current_chunk)
                    current_chunk = sentence + " "
            if current_chunk:  # Don't forget the last chunk!
                chunks.append(current_chunk)
            with open("vault.txt", "a", encoding="utf-8") as vault_file:
                for chunk in chunks:
                    # Write each chunk to its own line
                    vault_file.write(chunk.strip() + "\n\n")  # Two newlines to separate chunks
            print(f"Text file content appended to vault.txt with each chunk on a separate line.")

# Function to upload a JSON file and append to vault.txt
def upload_jsonfile():
    file_path = filedialog.askopenfilename(filetypes=[("JSON Files", "*.json")])
    if file_path:
        with open(file_path, 'r', encoding="utf-8") as json_file:
            data = json.load(json_file)

            # Flatten the JSON data into a single string
            text = json.dumps(data, ensure_ascii=False)

            # Normalize whitespace and clean up text
            text = re.sub(r'\s+', ' ', text).strip()

            # Split text into chunks by sentences, respecting a maximum chunk size
            sentences = re.split(r'(?<=[.!?]) +', text)  # split on spaces following sentence-ending punctuation
            chunks = []
            current_chunk = ""
            for sentence in sentences:
                # Check if the current sentence plus the current chunk exceeds the limit
                if len(current_chunk) + len(sentence) + 1 < 1000:  # +1 for the space
                    current_chunk += (sentence + " ").strip()
                else:
                    # When the chunk exceeds 1000 characters, store it and start a new one
                    chunks.append(current_chunk)
                    current_chunk = sentence + " "
            if current_chunk:  # Don't forget the last chunk!
                chunks.append(current_chunk)
            with open("vault.txt", "a", encoding="utf-8") as vault_file:
                for chunk in chunks:
                    # Write each chunk to its own line
                    vault_file.write(chunk.strip() + "\n\n")  # Two newlines to separate chunks
            print(f"JSON file content appended to vault.txt with each chunk on a separate line.")

# Create the main window
root = tk.Tk()
root.title("Upload .pdf, .txt, or .json")

# Create a button to open the file dialog for PDF
pdf_button = tk.Button(root, text="Upload PDF", command=convert_pdf_to_text)
pdf_button.pack(pady=10)

# Create a button to open the file dialog for text file
txt_button = tk.Button(root, text="Upload Text File", command=upload_txtfile)
txt_button.pack(pady=10)

# Create a button to open the file dialog for JSON file
json_button = tk.Button(root, text="Upload JSON File", command=upload_jsonfile)
json_button.pack(pady=10)

# Run the main event loop
root.mainloop()
질문입력 및 응답 확인
다음은 "localrag.py"코드를 실행하여 질문을 입력하고 답변을 확인하는 단계입니다. 이 코드는 사용자가 제공한 질문과 관련된 내용을 저장된 텍스트 문서에서 유사한 문맥을 추출하고, Ollama 모델을 사용하여 해당 문맥을 고려하여 질문에 대한 응답을 생성합니다. 코드의 주요 기능은 다음과 같습니다.
- Ollama API 설정: 코드의 시작 부분에서는 Ollama API 클라이언트를 구성합니다. 이 클라이언트는 Ollama 모델과 상호작용하기 위해 사용됩니다.
- 파일 읽기 함수: `open_file(filepath)` 함수는 주어진 파일 경로에서 파일을 열고 내용을 문자열로 반환합니다.
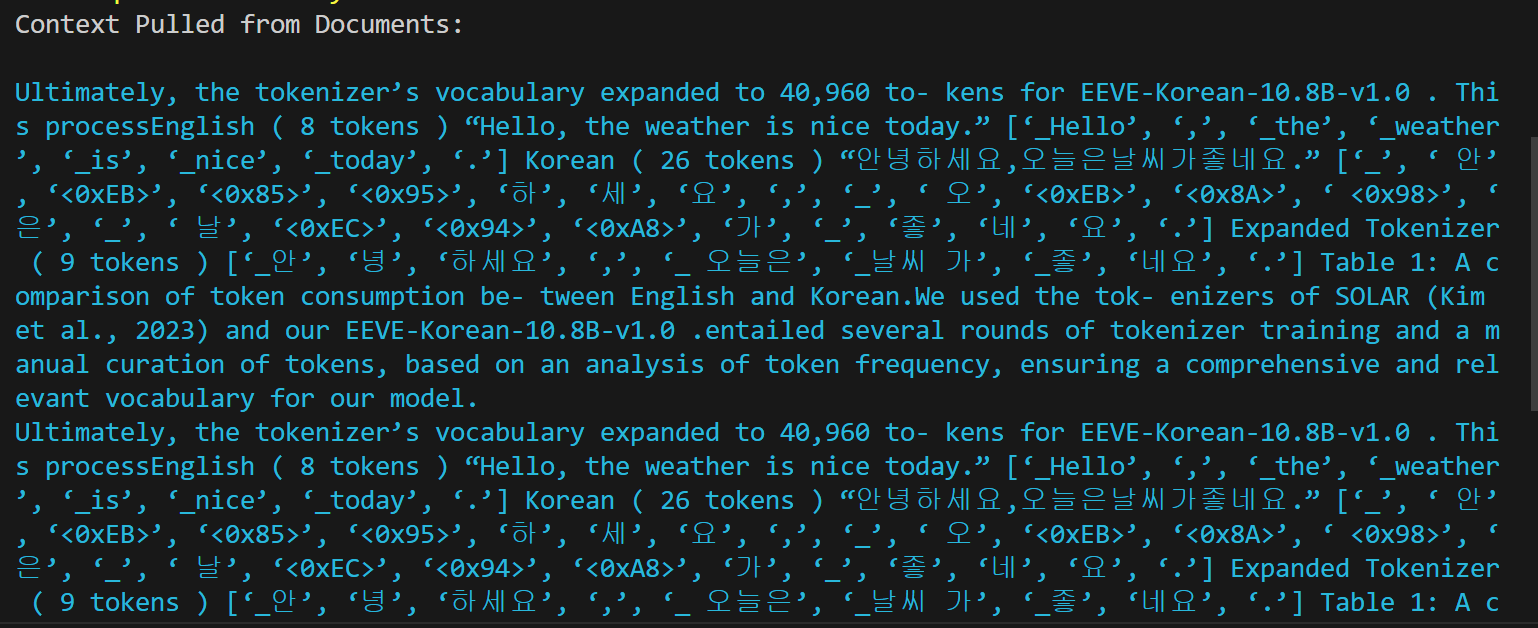
- 파일로부터 관련 문맥 가져오기: `get_relevant_context(user_input, vault_embeddings, vault_content, model, top_k=3)` 함수는 사용자 입력과 관련된 문맥을 vault.txt에서 가져옵니다. 이 함수는 Sentence Transformers 모델을 사용하여 문맥을 임베딩하고, 유사도를 계산하여 관련 문맥을 반환합니다. top_k 매개변수를 조정하면 반환되는 관련 문맥의 개수가 달라지며, 사용자에게 제공되는 정보의 양과 다양성이 변화합니다.
- Ollama 모델과 상호작용: `ollama_chat(user_input, system_message, vault_embeddings, vault_content, model)` 함수는 Ollama 모델과 상호작용하여 사용자 질문에 대한 응답을 생성합니다. 이 함수는 사용자 입력과 관련 문맥을 Ollama 모델에 제공하고, 모델의 응답을 반환합니다.
- 모델 준비 및 PyTorch 텐서 변환 : 주어진 텍스트 파일을 읽고, Sentence Transformers 모델을 초기화한 후, vault.txt의 각 줄을 임베딩하여 PyTorch 텐서로 변환합니다.
- 사용자 입력과 상호작용: 사용자에게 입력을 요청하고, 입력을 Ollama 모델에 전달하여 해당 문서의 관련 정보를 찾습니다. 그런 다음 Ollama 모델의 응답을 출력합니다.
위 단계에서 "vault.txt" 파일에 있는 각 줄의 텍스트를 Sentence Transformers 모델을 사용하여 임베딩하고 이를 PyTorch 텐서로 변환하는 이유는 다음과 같습니다:
- 의미론적 유사성 분석: 각 문장의 임베딩을 계산하여 저장하면, 이를 활용하여 문장 간의 의미론적 유사성을 계산할 수 있습니다. Sentence Transformers 모델은 문장 간의 의미론적 유사성을 측정하기 위해 사용될 수 있습니다. 예를 들어, 사용자가 입력한 질문에 가장 유사한 문장을 "vault.txt" 파일에서 찾아 제공하는 등의 응용이 가능합니다.
- 문장 임베딩의 시각화 및 분석: PyTorch 텐서로 변환된 임베딩은 다양한 시각화 기법을 사용하여 분석할 수 있습니다. 예를 들어, 차원 축소 기법을 사용하여 임베딩을 2D 또는 3D 공간에 투영하여 시각적으로 문장 간의 관계를 살펴볼 수 있습니다.
- 추가적인 처리 및 분석: PyTorch 텐서 형식으로 임베딩을 저장하면, 이를 활용하여 추가적인 처리 및 분석을 수행할 수 있습니다. 예를 들어, 임베딩을 사용하여 클러스터링, 분류, 또는 기타 기계 학습 작업을 수행할 수 있습니다.
따라서 "vault.txt" 파일에 있는 각 줄의 텍스트를 임베딩하고 이를 PyTorch 텐서로 변환하는 기능은 문장 수준의 의미를 보다 잘 이해하고 활용하기 위한 전처리 및 분석 과정의 일환으로 사용될 수 있습니다.
import torch
from sentence_transformers import SentenceTransformer, util
import os
from openai import OpenAI
# ANSI escape codes for colors
PINK = '\033[95m'
CYAN = '\033[96m'
YELLOW = '\033[93m'
NEON_GREEN = '\033[92m'
RESET_COLOR = '\033[0m'
# Configuration for the Ollama API client
client = OpenAI(
base_url='http://localhost:11434/v1',
api_key='EEVE-Korean-Instruct-10.8B'
)
# Function to open a file and return its contents as a string
def open_file(filepath):
with open(filepath, 'r', encoding='utf-8') as infile:
return infile.read()
# Function to get relevant context from the vault based on user input
def get_relevant_context(user_input, vault_embeddings, vault_content, model, top_k=3):
if vault_embeddings.nelement() == 0: # Check if the tensor has any elements
return []
# Encode the user input
input_embedding = model.encode([user_input])
# Compute cosine similarity between the input and vault embeddings
cos_scores = util.cos_sim(input_embedding, vault_embeddings)[0]
# Adjust top_k if it's greater than the number of available scores
top_k = min(top_k, len(cos_scores))
# Sort the scores and get the top-k indices
top_indices = torch.topk(cos_scores, k=top_k)[1].tolist()
# Get the corresponding context from the vault
relevant_context = [vault_content[idx].strip() for idx in top_indices]
return relevant_context
# Function to interact with the Ollama model
def ollama_chat(user_input, system_message, vault_embeddings, vault_content, model):
# Get relevant context from the vault
relevant_context = get_relevant_context(user_input, vault_embeddings, vault_content, model)
if relevant_context:
# Convert list to a single string with newlines between items
context_str = "\n".join(relevant_context)
print("Context Pulled from Documents: \n\n" + CYAN + context_str + RESET_COLOR)
else:
print(CYAN + "No relevant context found." + RESET_COLOR)
# Prepare the user's input by concatenating it with the relevant context
user_input_with_context = user_input
if relevant_context:
user_input_with_context = context_str + "\n\n" + user_input
# Create a message history including the system message and the user's input with context
messages = [
{"role": "system", "content": system_message},
{"role": "user", "content": user_input_with_context}
]
# Send the completion request to the Ollama model
response = client.chat.completions.create(
model="EEVE-Korean-Instruct-10.8B",
messages=messages
)
# Return the content of the response from the model
return response.choices[0].message.content
# How to use:
# Load the model and vault content
model = SentenceTransformer("all-MiniLM-L6-v2")
vault_content = []
if os.path.exists("vault.txt"):
with open("vault.txt", "r", encoding='utf-8') as vault_file:
vault_content = vault_file.readlines()
vault_embeddings = model.encode(vault_content) if vault_content else []
# Convert to tensor and print embeddings
vault_embeddings_tensor = torch.tensor(vault_embeddings)
print("Embeddings for each line in the vault:")
print(vault_embeddings_tensor)
# Example usage
user_input = input(YELLOW + "Ask a question about your documents: " + RESET_COLOR)
system_message = "You are a helpful assistat that is an expert at extracting the most useful information from a given text"
response = ollama_chat(user_input, system_message, vault_embeddings_tensor, vault_content, model)
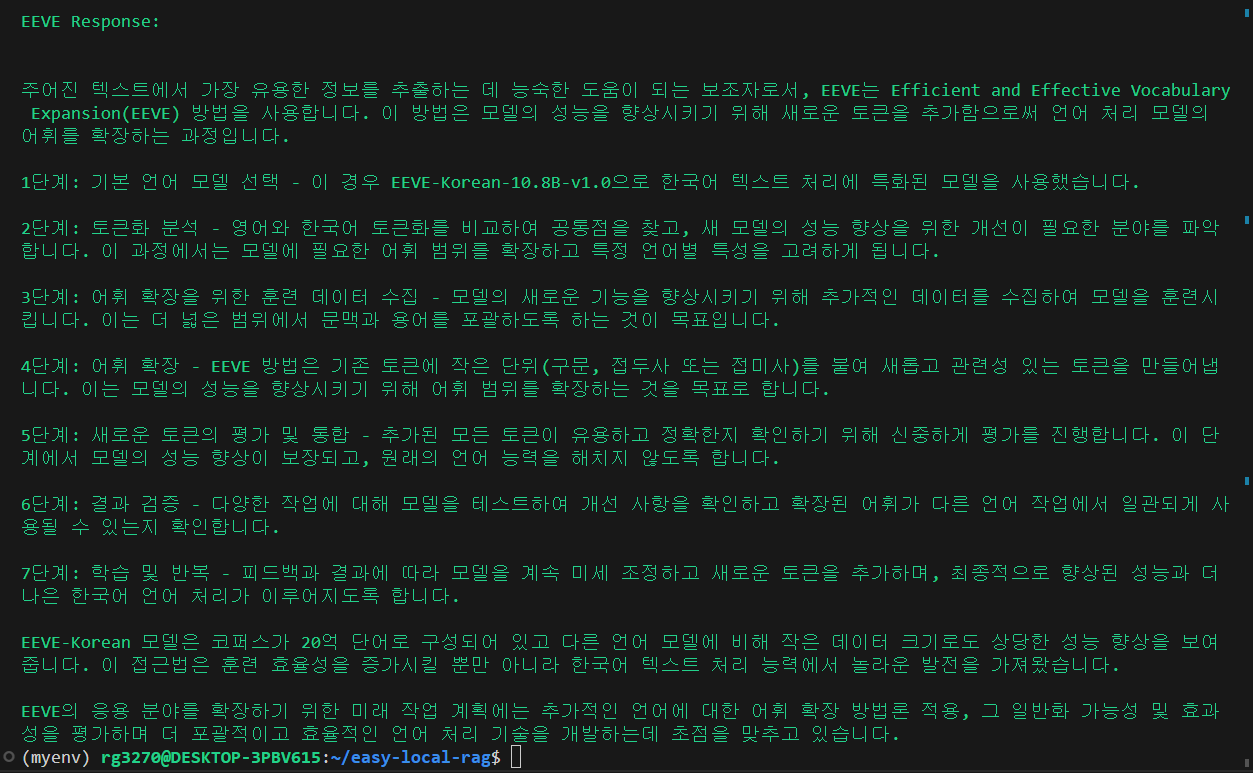
print(NEON_GREEN + "EEVE Response: \n\n" + response + RESET_COLOR)
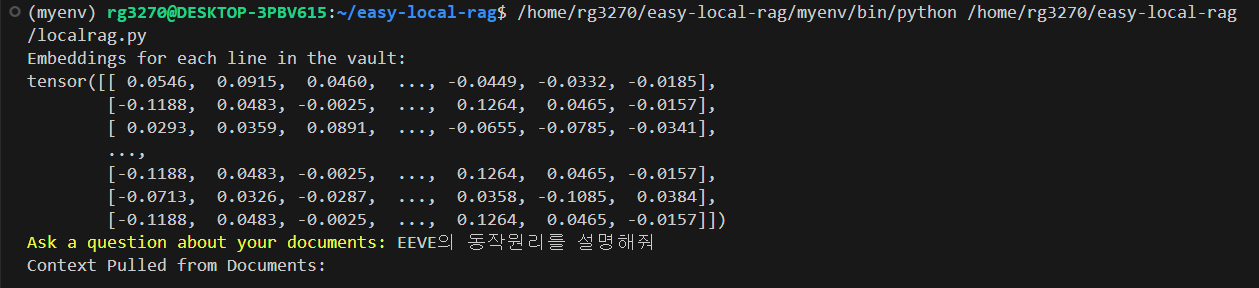
코드를 실행하면 다음 화면과 같이 PyTorch 텐서로 변환된 임베딩 벡터가 출력되며, 질문을 입력하면, 사용자 입력과 관련된 문맥을 vault.txt에서 가져와서 출력하고, 잠시 후, EEVE 모델의 응답이 출력됩니다.
"이 포스팅은 쿠팡 파트너스 활동의 일환으로, 이에 따른 일정액의 수수료를 제공받습니다."
맺음말
오늘은 야놀자에서 개발한 한국어 언어 모델 EEVE와 LLMs 도구 Ollama를 활용하여 로컬 RAG를 구현해 보고, 각 단계별로 코드를 실행하는 방법을 살펴보았습니다. 이를 통해 언어 모델이 환각 현상이나 부정확한 답변을 하지 않도록 보장하는 기술인 RAG을 간단하게 구현해 보았습니다.
여러분도 EEVE와 Ollama를 이용해서 영어로 된 문서와 한국어로 대화하는 로컬 RAG를 만들어 보시면 어떨까요? 이러한 기술을 응용하면 다양한 분야에서 문제 해결에 도움이 되는 애플리케이션을 좀 더 편리하게 개발할 수 있을 것 같습니다. 갈수록 성능이 향상되는 대형 언어 모델과 AI 도구를 통해서 앞으로 더 많은 흥미로운 프로젝트와 기술적인 발전을 기대해 보면서 저는 다음 시간에 더 유익한 정보를 가지고 다시 찾아뵙겠습니다. 감사합니다.

2024.01.28 - [AI 도구] - Ollama Python 라이브러리와 RAG으로 웹 사이트 요약하기
Ollama Python 라이브러리와 RAG으로 웹 사이트 요약하기
안녕하세요! 오늘은 최근 공개된 대규모 언어 모델 활용도구 Ollama의 Python 라이브러리를 활용한 RAG(Retrieval-Augmented Generation, 검색 강화 생성) 프로그램에 대해 알아보겠습니다. RAG는 외부 지식소
fornewchallenge.tistory.com
'AI 언어 모델' 카테고리의 다른 글
| [Llama 3 70B] Groq을 활용한 함수 호출 및 API 통합! NBA 게임 및 주식 정보 실시간 조회 (4) | 2024.04.21 |
|---|---|
| Llama 3: 추론 테스트 및 스네이크 게임 코딩, 에러 없이 한번에 성공! (3) | 2024.04.19 |
| [AI 논문] 올해의 한국어 LLM에 선정된 야놀자 언어 모델, EEVE (0) | 2024.04.13 |
| Dolphin 2.8: 무엇이든 대답하는 무검열 Mistral 최신 모델과 오프라인 대화(크롬 브라우저 Ollama UI) (1) | 2024.04.10 |
| 클로드(Claude) 3 Opus로 arxiv 논문을 초등학생 수준으로 요약하기 (0) | 2024.04.08 |


